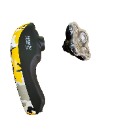
STEP ONE:
1. Check the charger: Please plug the shaver into the charger and leave it for 2-3 hours (Original Unit: The full battery symbol will stop blinking and remain constant when fully charged, New Unit: will display 0-100% battery).
2. Check the Shaving Head: Please remove the shaving head (Instructions below) and power on the shaver.
Click this link to watch a video on how to remove your shaving head
Pull straight out, not at an angle. Do not twist, this will break the support bars.

3. If the shaver runs with the shaving head REMOVED, please go to step 2 (below) and deep clean the shaving head.
4. If the shaver still does not turn on when the shaving head is REMOVED, please submit a ticket to our customer service team, we are happy to help.
STEP TWO:
The Bald Buddy has an auto-shut-off function, this is to protect the motor. The most common reason it will auto-shutoff is a build-up of hair, or shaving cream in the blades and gears.
If your Bald Buddy works when the shaving head is removed, this is due to the shaving head being clogged. Luckily this is an easy fix!
We have directions along with videos to show you the best way to clean your shaving head. Click this link to clean your shaving head: Click here to view this article on cleaning your shaving head
Review of the Article (Link above):
1. During and After every shave: power on your shaver while the shaving head is immersed in a bowl of warm water, this will push out anything that is in the gears and blades and will ensure the shaver will not auto-shutoff on you the next time you go to shave.
2. If you have not cleaned out your shaving head in a while, or your blades are not turning: you will want to do a deep clean. You open the blades and let them soak in warm soapy water. Remove any visible debris. Then re-assemble your shaver and repeat step 1, powering on the shaver while the blades are immersed in a bowl of warm soapy water.
You can always reach out to our customer support team, we are happy to help.


